Showing posts with label newvegetables. Show all posts

Wednesday, September 17, 2014

I Have Yum Yums!

The pain has really been taking a toll on me the past few months. It is very difficult to think about food when concentrating on just getting important things accomplished. Still, with all the lovely fresh tomatoes coming from my garden, and the wonderful surprise of beautiful carrots, I had no choice but to cook (and preserve) the bounty. So far, I have canned up salsas and tomatoes (cut up and as a plain sauce) and dehydrated a lot of zucchini and such, which is terrific (and will be blogged about another time), but the real treats have been the new recipes I have created to take care of some of the glut.

My first two recipes were created in tandem. I was whipping up some American Chop Suey and decided that, as will all foods, bacon would be a perfect boost to flavor. I could not bear to waste all that flavorful fat, so I sauteed onions in it for the dish, but realized that I made too much, so 1/2 a cup of the now cooked onions were set aside for the salad.
I also made a delicious pot roast last night. My son came by in the morning, and after poking around in the garden in the cool morning air, we walked (or I hobbled) to the local butcher to see what he had. There, I picked up five pounds of chicken backs for stock as well as 2 1/2 pounds of chuck roast. There was little fat on it, especially for a chuck roast, but it cooked up nicely in wine and dried tomatoes from last season.

I do not have pictures of everything, that tends to be one of the last things on the list to do, and as I mentioned, it has been rough these past weeks.

Without further ado, here we go.


Beef Pot Roast with Mushrooms and "Sun Dried" Tomatoes

Ingredients:

2 1/2 pounds beef chuck roast
1 cup dry red wine
1/2 cup dried tomatoes, not in oil (I used dried cherry tomatoes from last seasons garden)
1 onion, chopped
4 cloves of garlic, smashed and roughly chopped (I cut into quarters then slice them)
2 sprigs of rosemary
salt and pepper
3 large white potatoes, peeled and halved
1/2 pound or more of carrots (carrots have a strong flavor, so just enough to serve the number of folks eating) trimmed and scraped when necessary.
8 oz sliced mushrooms, roughly chopped if large
2 Tablespoons flower
2 Tablespoons butter

I use my slow cooker to make this, but it will work wonderfully on the stove top too. Just cook it on a very low simmer rather than use the slow cooking instructions. Alternative, you can use the oven on a low setting, but you will have to experiment as I have no oven to work with currently.

Since my slow cooker has an insert I can use on the stove top, I do that. Everyone else should use a heavy saute pan of some sort, just be sure it is non reactive as the wine can cause a reaction with some metals. Non reactive would be enameled cast iron, cast iron that is VERY WELL seasoned. My pans are well over a hundred years old, and I do not feel confident they are sealed enough, but that is me based on my having tried making tomato sauce in the darned things for years before figuring out why it tasted "off" all the time. Other pans to use are stainless steel or anything with a non stick surface, though the fond won't be as nice from non stick.

Salt the beef and sear in a pan on high heat using a touch of oil just to keep the sticking down a bit. The browned bits are full of flavor, so you don't need to keep it from sticking entirely, we just don't want burned bits rather than deep brown. Give it a really good sear, your patience will be rewarded (thank you Alton Brown).

Remove browned beef from the pan and add the onions. Keep an eye on it and stir until they start to get translucent. Add the garlic and cook until the smell of the garlic wafts up from the pan. Add the wine, starting with 1/2 cup to deglaze the pan. Continue adding the wine and let cook for a bit to help dull the alcohol flavor a bit. Add the beef back to the pan along with the dried tomatoes and set on high for one hour and turn to low for two more hours.

Prepare the vegetables. These are small carrots from my garden that were just gorgeous, so I left some of the stem and cleaned them very thoroughly, as well as scraping the skins off of the ones that were bumpy to be sure I removed all of the dirt. Peel the potatoes (I find the larger whites have tough skins, but if you are using younger white potatoes or red skinned types, you can leave the skin on)

Put the vegetables and rosemary in the pot, turn to high for one hour and then back to low until the vegetables are cooked through, another two hours.

To make the gravy, add the butter to a frying or saute pan and cook the mushrooms until the liquid escapes, dissipates, and the mushrooms start to brown. Season the mushrooms with salt and pepper to taste. Sprinkle the flour over the mushrooms and cook for a few minutes to get the raw flavor of flour out. Strain the pan juices and slowly add to the pan until you reach your desired thickness. Remember to keep it a bit thin as it will thicken as soon as it starts to cool a little.

Serve!

Are they not gorgeous?
I have no pictures for the next two recipes. At least I do not right now, but it was so delicious I could not, not share.

American Chop Suey Michele Style

1 pound ground beef
6 slices good bacon
1 large onion, chopped
3 cloves garlic, minced
1 1/2 pounds of plum tomatoes, peeled and cut up
1 cup chicken stock (broth will work, but the gelatin in the stock makes this amazing)
2 cups shaped pasta (traditionally elbows, but I used campenelle which was perfect)

Cook the bacon until brown and just crispy. Do not over cook as it will taste "off". Remove the bacon to drain. Pour out the fat, leaving two tablespoons for cooking the onion. Add the onions and cook until translucent and just slightly starting to caramelize. Remove 1/2 cup of onion for use in salad. Add garlic to pan and cook until the smell of the garlic wafts from the pan to your face. Remove vegetables to a bowl.
Brown the ground beef. Leave some nice lumps, you want something to chew in this. Drain the beef and add the vegetables back in along with the tomatoes and stock, scraping up any bits from the bottom of the pan. Cover and simmer 10 minutes. Add pasta, cover and cook ten minutes more or until pasta is al dente. Add four slices of lightly crumbled bacon and stir. (the other two slices are for the salad)

Snow White Salad

I call this Snow White salad because that is the type of tomatoes I used and they are fabulous. Substitutions can be any sweet tasting tomato, preferably a cherry or grape variety.

Ingredients:

1-2 cups of Snow White cherry tomatoes, cut in halves.
2 big handfuls of baby spinach, well washed and trimmed
1/2 cup of onions cooked in bacon fat
2 slices cooked bacon, crumbled
1 tablespoon mayonnaise
Pinch of salt, if required (to taste)

This is easy, just toss it all together in a bowl. The onions should not be hot, but warm is fine. The amount of mayonnaise is a suggestion, there is no need to use a lot, just enough to make a light dressing with the juices from the tomatoes and the flavors from the bacon and onions. Serve immediately, this salad does not keep well, to my eternal sadness.

Stay tuned for my laundry detergent tests, making dishwasher discs, and other fun things I have been doing this season aside from gardening.

Thursday, July 17, 2014

Mouse Melons are Here!

I have two major gardening experiments this year. One is the basket of potatoes, which should be ready to harvest soon, so I will write about that when it happens. The other was the planting of Mouse Melons or Mexican Sour Gherkins.

These little viners are taking over! I didn't have more than ten seeds, and these plants are very small as far as space needed between them, but the five that I think made it through the transplant have completely taken over one side of one of my four by four raised beds. This is not a bad thing, I love seeing a plant thrive. It makes me tickly on the inside.

According to all the literature, these bitty melons are supposed to hit about 2 inches, but these ones are far smaller as you will see. I was noticing some yellow on them, so, if they are like cucumbers, I would rather pick early than end up with a bitter fruit.

Mouse Melons I picked today. These are also sold as Mexican Sour Gherkins and a couple other names.

I was so excited I popped one right in my mouth, washing be damned! I avoided eating any bugs in my haste, and was very surprised at the huge flavor in such a little fruit. This tastes the way I expected the Lemon Cucumbers to taste. They taste just like cucumbers, but with a twang of lemon. The first bite registered as a little bitter, but that immediately fell away to the true nature of this lovely little curbit. (I believe the jury is still out on its full classification, but the more formal name is Melothria scabra). The lemon flavor is light, but really refreshing, I really can't explain how much I like these. So far it seems that I will be getting many, many fruits to experiment with over the summer, so stay tuned!

Monday, April 21, 2014

So Much Dirt!


Oh Spring how I love thee!

So far this season I have had some health issues (big surprise) and  a lot of pain, but the garden will happen again this year. The garlic I planted in the Fall is sprouting, thought not as vigorous as I would have liked. 


I wasn't taking a picture of the garlic specifically, so this is a fuzzy picture. Still, there is that green! I covered the bed with landscape fabric to keep the soil warm during our frequent cold snaps.


I also planted a bed with spinach and other early direct sow crops, and there is some sprouting happening, though the local wildlife likes to dig in my root crop beds (turnips, carrots, beets). My experiment in growing potatoes in a tall laundry basket is also testing my patience.

What started as six little strawberry plants last year has expanded greatly. My husband and I are working on a vertical planting system for them using PVC. 
This is what they looked like last year at planting. 

That entire patch of the darker green? All strawberry plants that overwintered.


Only one of the rhubarb plants made it through the winter, but I have many seedlings living the good life in my kitchen, so maybe there will be more later My neighbor has tried growing them in containers, but that isn't working out for her.

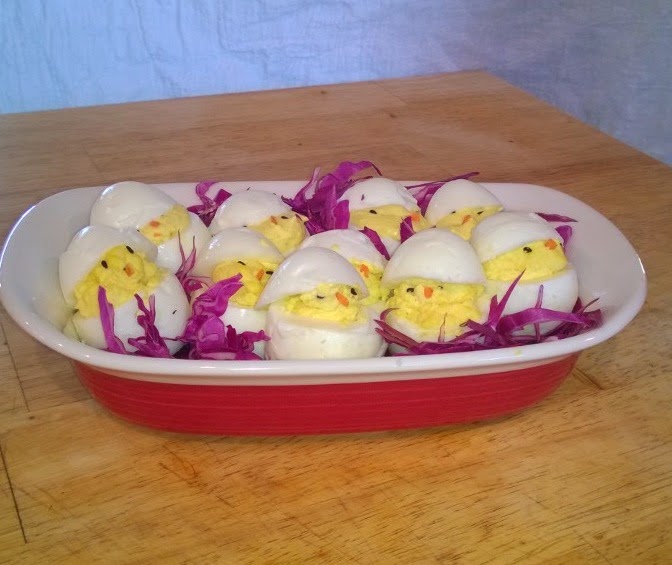
Now yesterday was Easter, and the weather was lovely. We had the family together for a few hours and I served deviled eggs, fruit salad and a lovely bread pudding using croissants and buttermilk.

The trick is to make the filling creamy enough to be tasty, but dry enough to hold its shape. I am working on it. :)
While everyone was eating, I tackled the old compost pile that I started 17 years ago as well as creating a raised bed for the asparagus I have coming in today. Sadly, I can't find a picture of it for a "before", but this is what I have the clearing down to:

17 years of composting leaves, scraps and rabbit poo, all finally getting used.
Where did I put all that compost? Why in a new garden bed of course!
Half done!
I am using building materials that had been left with the house.


When we moved in there were a lot of building materials laying around. The bricks were used as a walkway in the main garden bed and the concrete blocks surrounded the daylilies. I will be planting marigolds and such in the concrete blocks because asparagus doesn't play nice with other plants, but marigolds are helpful partners in the garden attracting pests away from the other plants as well as attracting pollinators for all.

I won't lie, it is hard doing all this will a busted up back and the other health issues, but even with the ouchies, I feel much more centered when I am out in the fresh air helping nature along. 

And, one more note on Spring gardening, my raspberries are growing beautifully!


Monday, September 9, 2013

All of the Tomatoes!

Hello everyone! I had my surgery last Friday and have been spending my time trying to keep up with the work around the house without setting back my recovery. Super fun, as I strongly dislike sitting around with things to do that I am not allowed to.

Before I went to surgery though, everyone's tomatoes came in! This may be coming a bit late for some, but just before I went in, I canned some tomatoes and salsa, and the one thing that you always have to do for those items is peel. There are some who don't peel for salsa, and that does no harm, but I tried it once and found too many sharp strips of peel in the condiment for my taste.

You may notice that I am not mentioning sauce with the peeling. There is a reason. If you are canning tomato sauce, there is no need to peel each tomato. That goes for ketchup or anything that you will be turning to a soupy sauce. In those cases, I just wash the tomatoes, core, chop them a bit and cook them down. Once they are nice and soft you can put it through a strainer or a mill and that will remove the skins and seeds. Some people find cooking the seeds in the sauce makes it bitter. If that is you, just scoop the seeds out of the slices before putting them in the pan.
Now, on to peeling tomatoes for other recipes. The pictures below should help lead you through any unclear bits.

1. Wash tomatoes thoroughly. Even organic vegetables are exposed to bacteria, and if you are canning it is best to be as clean as possible to avoid contamination in the finished product.

2. Lightly score an "X" at the blossom end of the tomato.

3. Plunge tomatoes into boiling water in batches. As soon as the skins seem to be slipping a bit, drop them in cold water to shock them.

4. The skins should peel easily from the cuts. Although I have always cored after peeling, it makes sense that coring before blanching would make the skins even easier to remove. Doh!

5. To "core", use a melon baller and scoop the stem end out. I hate that they call it "coring", to me that implies removing the center entirely.

6. Use as directed in recipe.

Coming up: Adventures in making pantry staples!

Saturday, August 3, 2013

How Does Your Garden Grow?

There has been a whole lot of things going on at the inbetween homestead. I have been doing a lot of little projects in preserving and making my own condiments and such. With all of this going on as well as the garden really needing to be tended, I am also having a spinal fusion operation pretty soon, so I feel as though I have so many things to do before I can no longer do them for a while. 

So, I will be trying to post some of the things I have been doing this summer while I recuperate, and give updates on the vegetable garden. First, here is a couple pictures of my Three Sisters garden, which is looking lovely:


I am quite happy for the most part. There are things that I should have done and did not. The first thing I am doing next time is to add something to lighten the soil. There was plenty of compost and such, but the soil still hardened up quite a bit after watering. I also need to rethink the edges. Maybe if I plant the squash before everything else? At the very least, I am starting the squash inside next year, so that the plant will keep the soil on the edges from eroding. I lost an entire squash type and I have only two of one of the squashes (I don't know which kind), but the spaghetti squash (Tivoli) is producing like a pro! 
The beans are also doing well, but I don't know which ones. Let this be a lesson, label everything when you plant them! Still, they are vining great, but since I planted so many, I have placed some straight limbs from the brush pile for them to grow on. They do vine up the corn, and the corn seems to be okay with this, I just had a lot of bean plants and am afraid of strangling the corn.

Here is a shot of my lovely spaghetti squash:

Isn't she beautiful?
And this is how my garden grows right now. The season has been fickle to say the least. Our last frost was into May this year, which stunted the plants I put out early. Also, we started the season with great weather conditions rain wise, but then we had a very hard dry spell followed by extremely wet conditions. That is making it a bit difficult for my tomatoes, but I have dried a batch of the Red Lightnings already.

Here is a peek a boo shot of my pickling cucumbers


Bowl of Red Lightning Tomatoes


Next up will be a couple of canning sessions which includes Victorian BBQ and Fig Preserves as well as some dehydration projects that I am doing to limit the food waste that tends to happen in the glut of summer produce.

Also, there will be an update on my pallet garden. Things did not turn out as expected, although I did get a few greens out of it. What happened is I learned some stuff, and hopefully will be able to put that to use in making the pallet garden work much better next time.