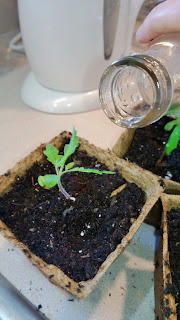
 Here is how to repot seedlings, or at least the tomatoes. I like doing it this way rather than starting them in the larger pots to begin with because tomatoes let you bury up the stems which stabilizes leggy newbies.
First you have to prepare the potting soil. I used an organic, but there were a lot of twigs in there. It isn't a good idea to leave them in with the new seedlings because they are just getting started and those twigs are mighty big to the little plants. You don't have to sort that right away though, just keep it in mind as you fill the little pots.
To prepare the soil, scoop a bunch into a container. I am using a little plastic wash basin that I use for camping:
 Then you need to add water. I like to add warm water, even hot water if the soil has been in a cold place. The soil should never get more than blood warm though. Now, stir it around really good. Don't add a lot at once until you get the feel for it. You don't want mud! Just get it all good and damp, it should gather when squeezed but easily fall back into dirt (not big clumps). If you add too much, throw some more potting soil in there.
 Now, label those pots! I started doing this and completely forgot so I have a couple mystery tomato plants. The RL stands for "Red Lightning". I know what tomato plants look like, so I don't have to put that on there. If you are new to this, you might want to put something on it, or gather them together in the same trays and label the tray.
 Fill the pot lightly. You are going to make a deep hole with your finger, so don't tamp down. You will add more later.
There is the hole, if you can see it. Then you want to gently, I mean gently remove the seedlings from their other container. I grew up putting two seeds in each compartment, but I think that was unnecessary. Since I did, I had to gently (I can't say that word enough) tease the roots apart and choose the sturdiest one. Sometimes that is the small one, so don't be fooled by size. (Where have I heard that before?)
Now ease it into the hole you made and gently pile the dirt around the stem. This is the neat part about tomatoes, you can plant them pretty deep. Once the real leaves come out, which is when you would repot them, you can put them in past the root ball. Any part of the stem in the dirt will root, making the plant much more sturdy.
See how deep that little seedling is? Now, I carefully put some water on it. The reason for this, even though the soil is already moist, is to help settle the dirt and remove air from around the roots.
Put them under the lamps but make sure that they are not too close to the lights. I give them about six inches or so clearance. Keep an eye on them so that you can move the lights if they get too tall.
That is what I love about my set up. I can move the lights anyway I want, and change the shelf settings.
Happy planting! Get those hands dirty!


No comments:
Post a Comment